

Integration and Setup
How do I integrate Razorpay Secure with my Shopify store?
How do I integrate Razorpay Secure with my Shopify store?
I tried connecting Razorpay Secure to my account but was unsuccessful. When I try to reconnect, the screen appears different. How should I proceed?
I tried connecting Razorpay Secure to my account but was unsuccessful. When I try to reconnect, the screen appears different. How should I proceed?
-
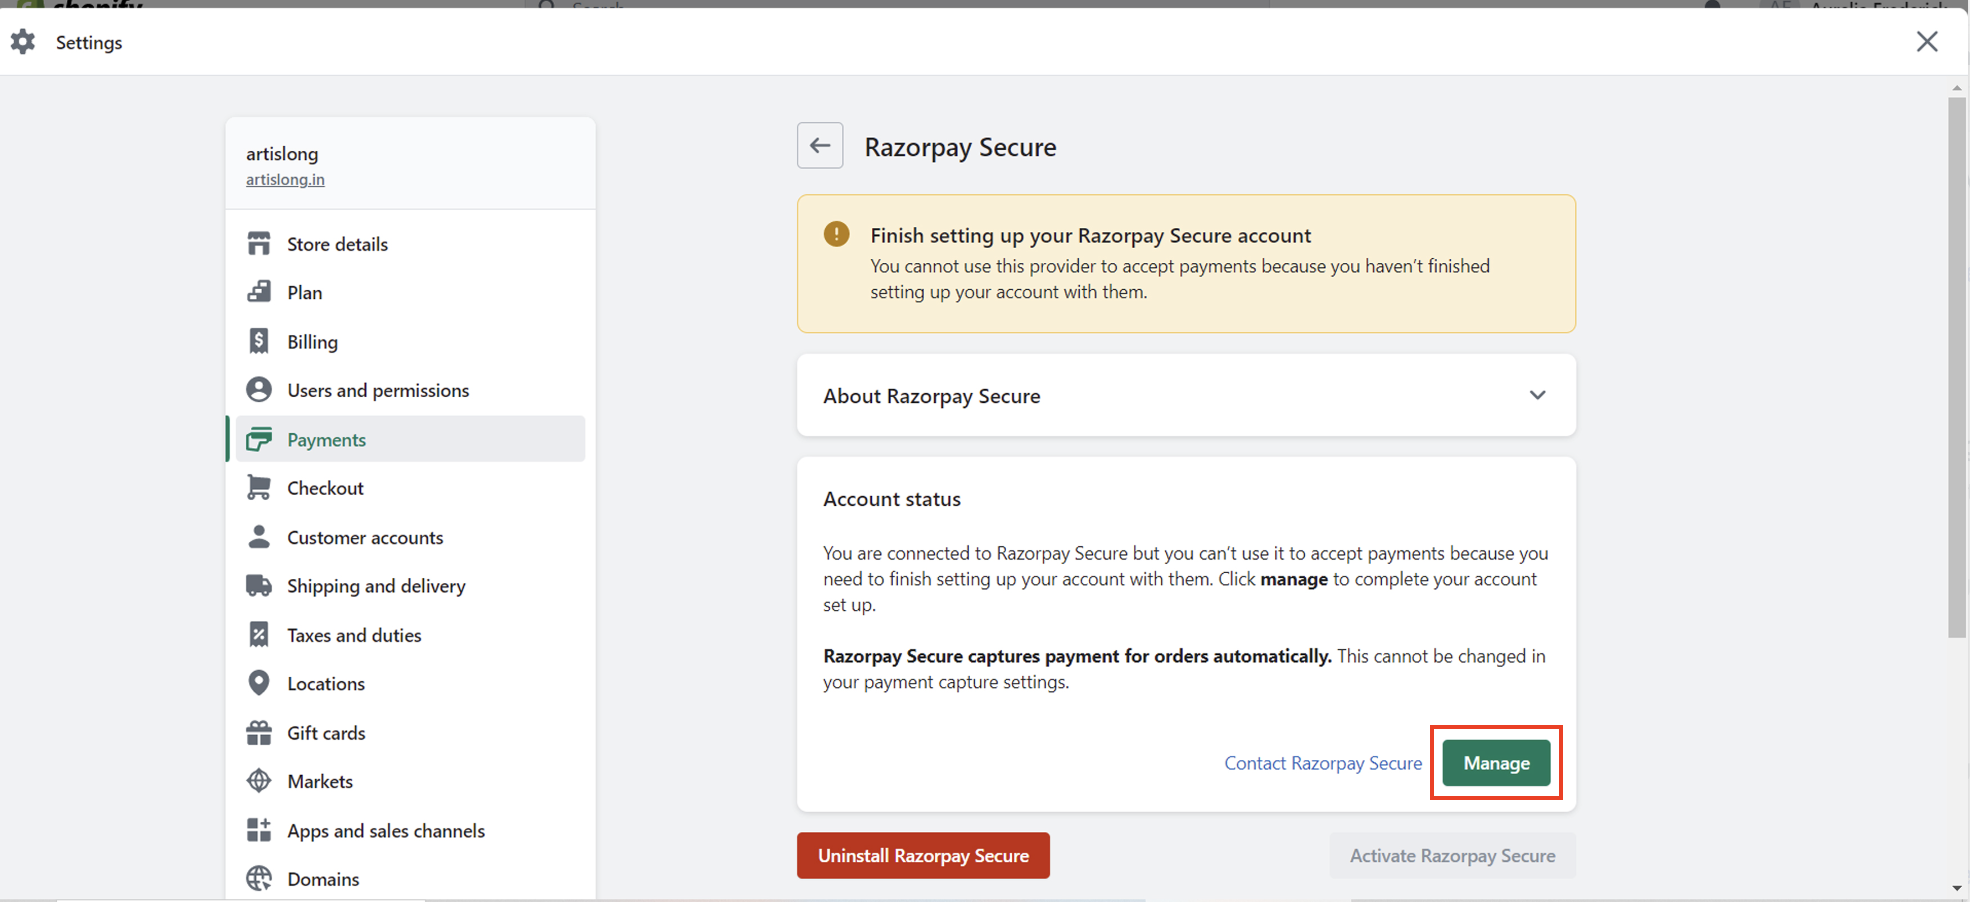
When you try to reconnect, you will get the following screen. Click Manage.
- You will be redirected to a landing page. Click I am an existing user.
- Scroll down and click Login.
- Click Activate on the activation screen on your Shopify Dashboard.
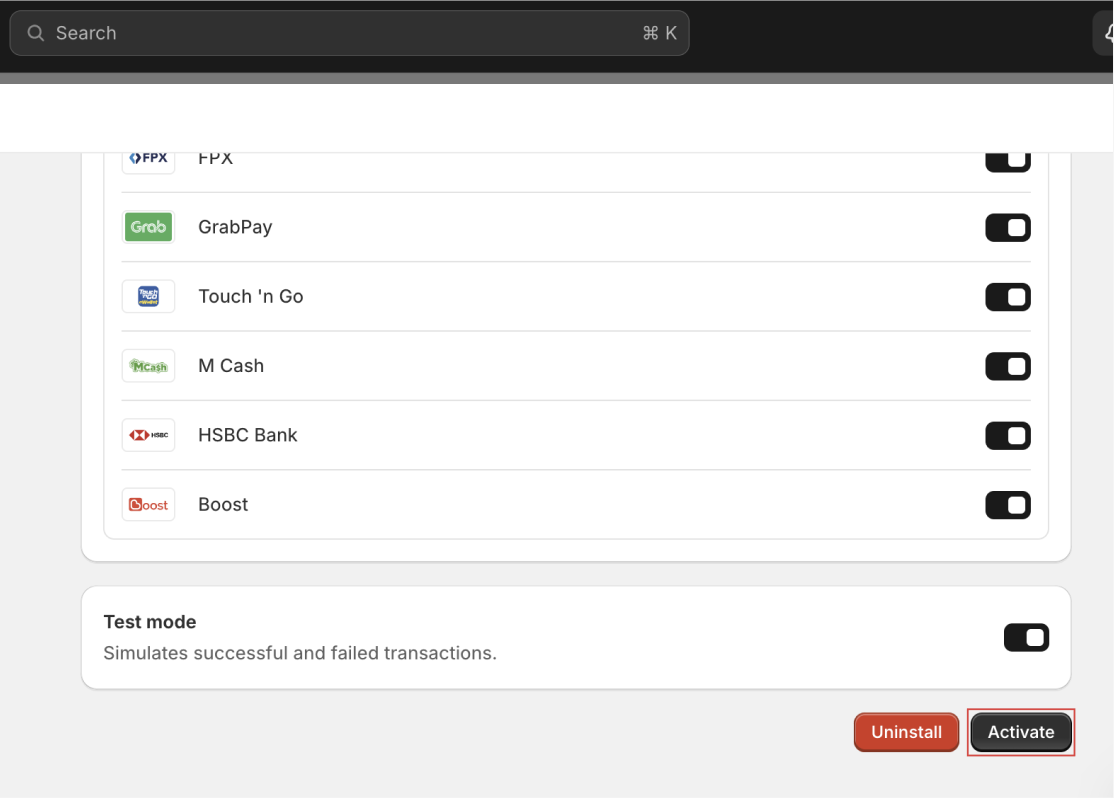
This completes your integration.
I am getting the following error message, "Email ID Mismatch." Why?
I am getting the following error message, "Email ID Mismatch." Why?
You can update the email ID on Razorpay Curlec to match the one used in Shopify. Verify that the email ID associated with owner access on Razorpay Curlec matches the one used in Shopify.
Do I need API keys to integrate a payment app with Shopify?
Do I need API keys to integrate a payment app with Shopify?
How do I uninstall payment app from Shopify?
How do I uninstall payment app from Shopify?
- Log in to your Shopify admin panel and navigate to Settings→Payments.
- Click Add payment methods.
- Click Search by provider and type Razorpay Curlec. This will show all the Razorpay Curlec payment apps installed on your Shopify store. Click the Razorpay Curlec app that you wish to uninstall.
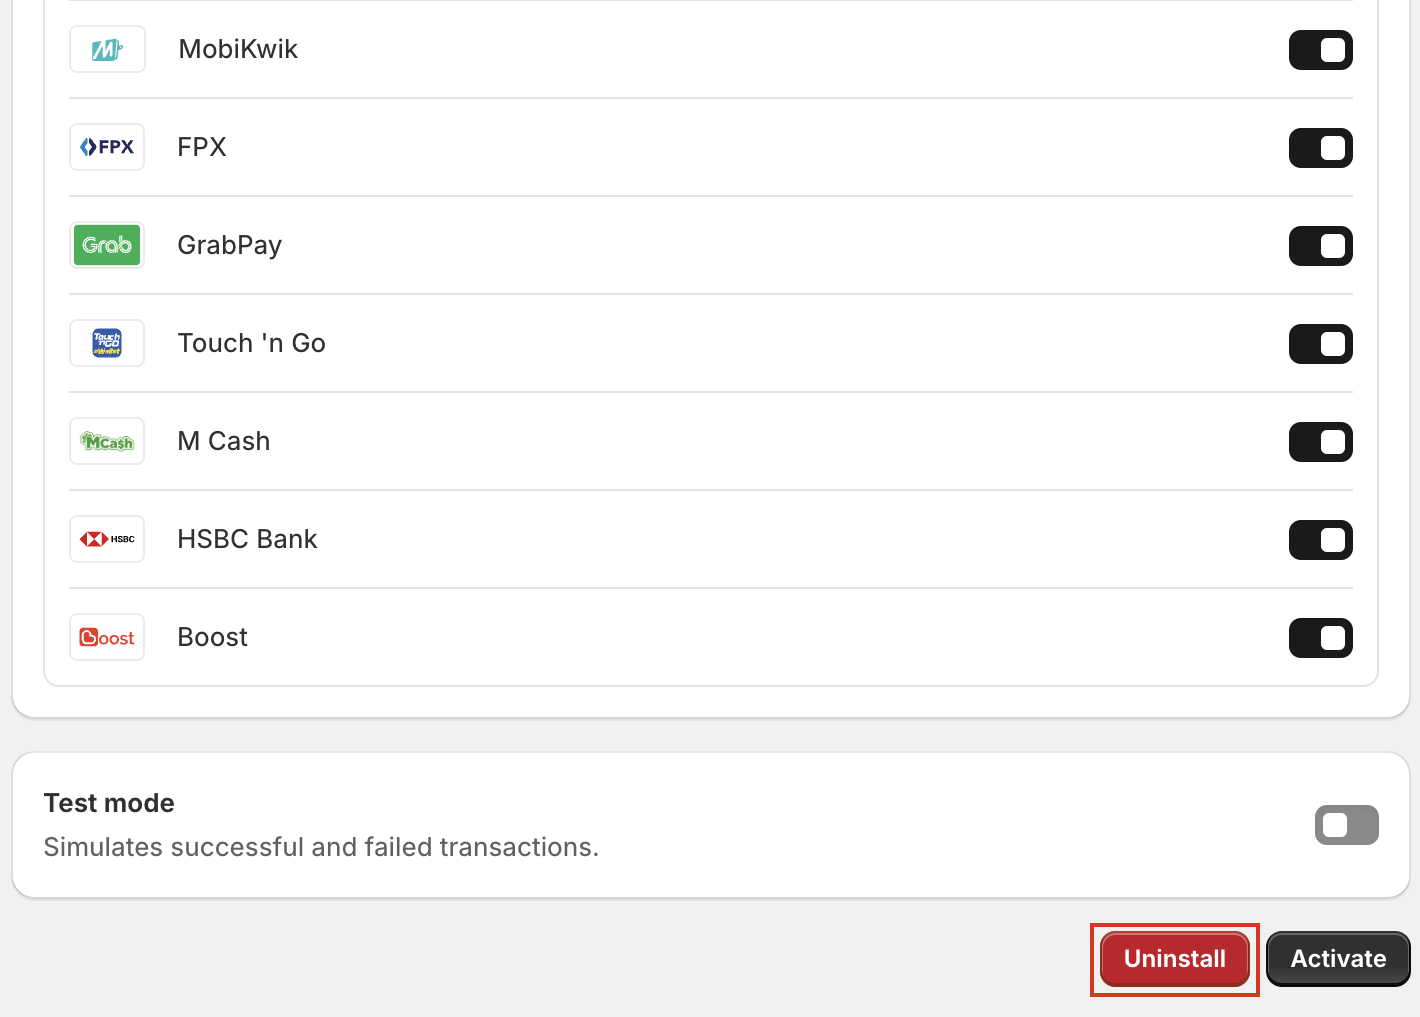
- Scroll down to the bottom and click the Uninstall button to remove the app from your Shopify store.
Our Payment Gateway stopped displaying after migrating to Shopify. How can we reactivate it?
Our Payment Gateway stopped displaying after migrating to Shopify. How can we reactivate it?
Checkout and Payment Issues
My customer is getting the following error when they make payments on my Shopify store, "There was an issue processing your payment. Try again or use a different payment method." What should I do?
My customer is getting the following error when they make payments on my Shopify store, "There was an issue processing your payment. Try again or use a different payment method." What should I do?
- Open your Shopify store in incognito mode.
- Navigate to Settings → Payments. Click Manage on Razorpay Secure.
- Go to Deactivate Razorpay Secure and click Uninstall Razorpay Secure. This uninstalls the Razorpay Secure app.
The payment option has disappeared from my Shopify checkout after I added another payment provider. Even after removing it, does not show up and I see the error "This store can't accept payments right now." What should I do?
The payment option has disappeared from my Shopify checkout after I added another payment provider. Even after removing it, does not show up and I see the error "This store can't accept payments right now." What should I do?
- Navigate to Shopify Admin → Settings → Payments → Payment Method Customizations.
- Disable or remove all customizations listed under this section.
- Save the changes and refresh the checkout page.
How can I test a payment for Razorpay Secure on the Shopify store?
How can I test a payment for Razorpay Secure on the Shopify store?
After migrating to Razorpay Secure, the checkout option for Razorpay Secure appears at the bottom of the list of gateways. Is it possible to move the checkout option to the top of the list of gateways?
After migrating to Razorpay Secure, the checkout option for Razorpay Secure appears at the bottom of the list of gateways. Is it possible to move the checkout option to the top of the list of gateways?
Account Management
Can I connect two merchant ids (MIDs) to the same Shopify Store?
Can I connect two merchant ids (MIDs) to the same Shopify Store?
Can I integrate a second Razorpay Curlec account with my Shopify store?
Can I integrate a second Razorpay Curlec account with my Shopify store?
I have two Ecommerce websites owned by my company. If I connect both websites to my account, will the customers be redirected to the correct webpage after payment?
I have two Ecommerce websites owned by my company. If I connect both websites to my account, will the customers be redirected to the correct webpage after payment?
Pricing and Settlements
Will I be charged extra for integrating/migrating to Razorpay Secure app?
Will I be charged extra for integrating/migrating to Razorpay Secure app?
When will my funds be settled?
When will my funds be settled?
Features and Limitations
Does the Shopify Razorpay Secure plugin support 3 or 0 decimal unit currencies?
Does the Shopify Razorpay Secure plugin support 3 or 0 decimal unit currencies?
How do I integrate Meta Pixel to accept payments through Meta Ads?
How do I integrate Meta Pixel to accept payments through Meta Ads?